April 2, 2019
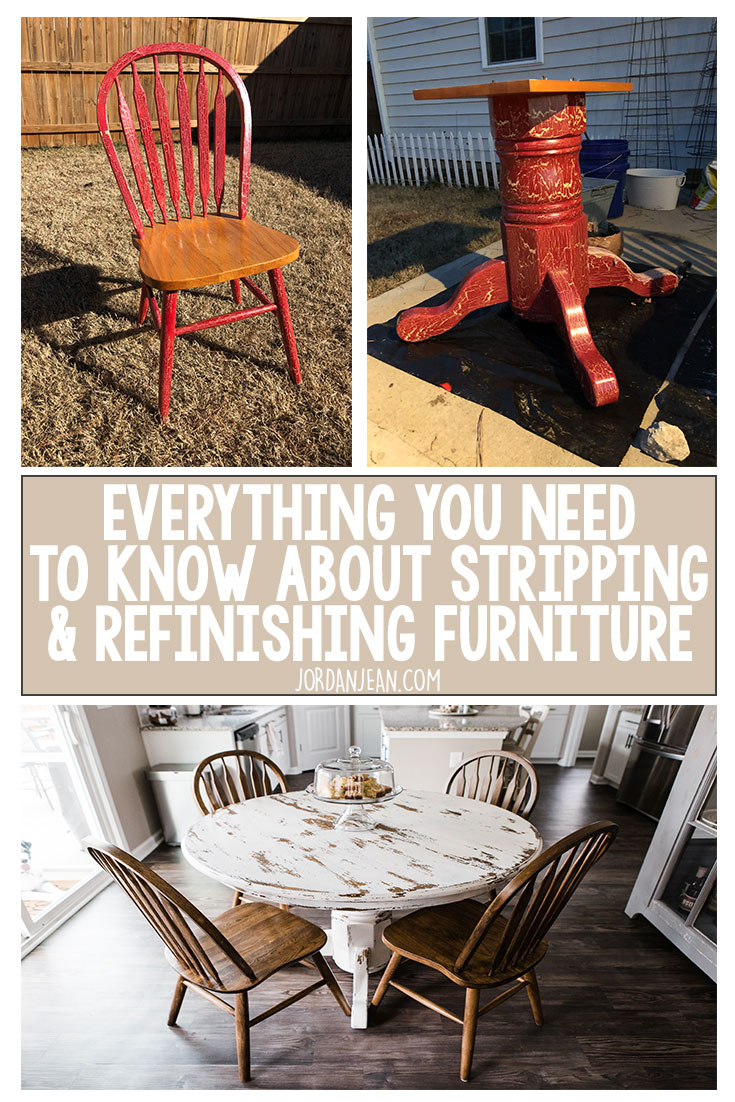
The title of this post really should be “How to Strip Painted, Polyed, Crackled, Polyed Again x 12 Furniture”, haha! Boy was this project was a BEAST! One table, one leaf, and 6 chairs. I don’t know if I’ve ever worked so hard on something in my life. A lot of you know via Instagram stories that it took me quite some time. Three months to be exact…
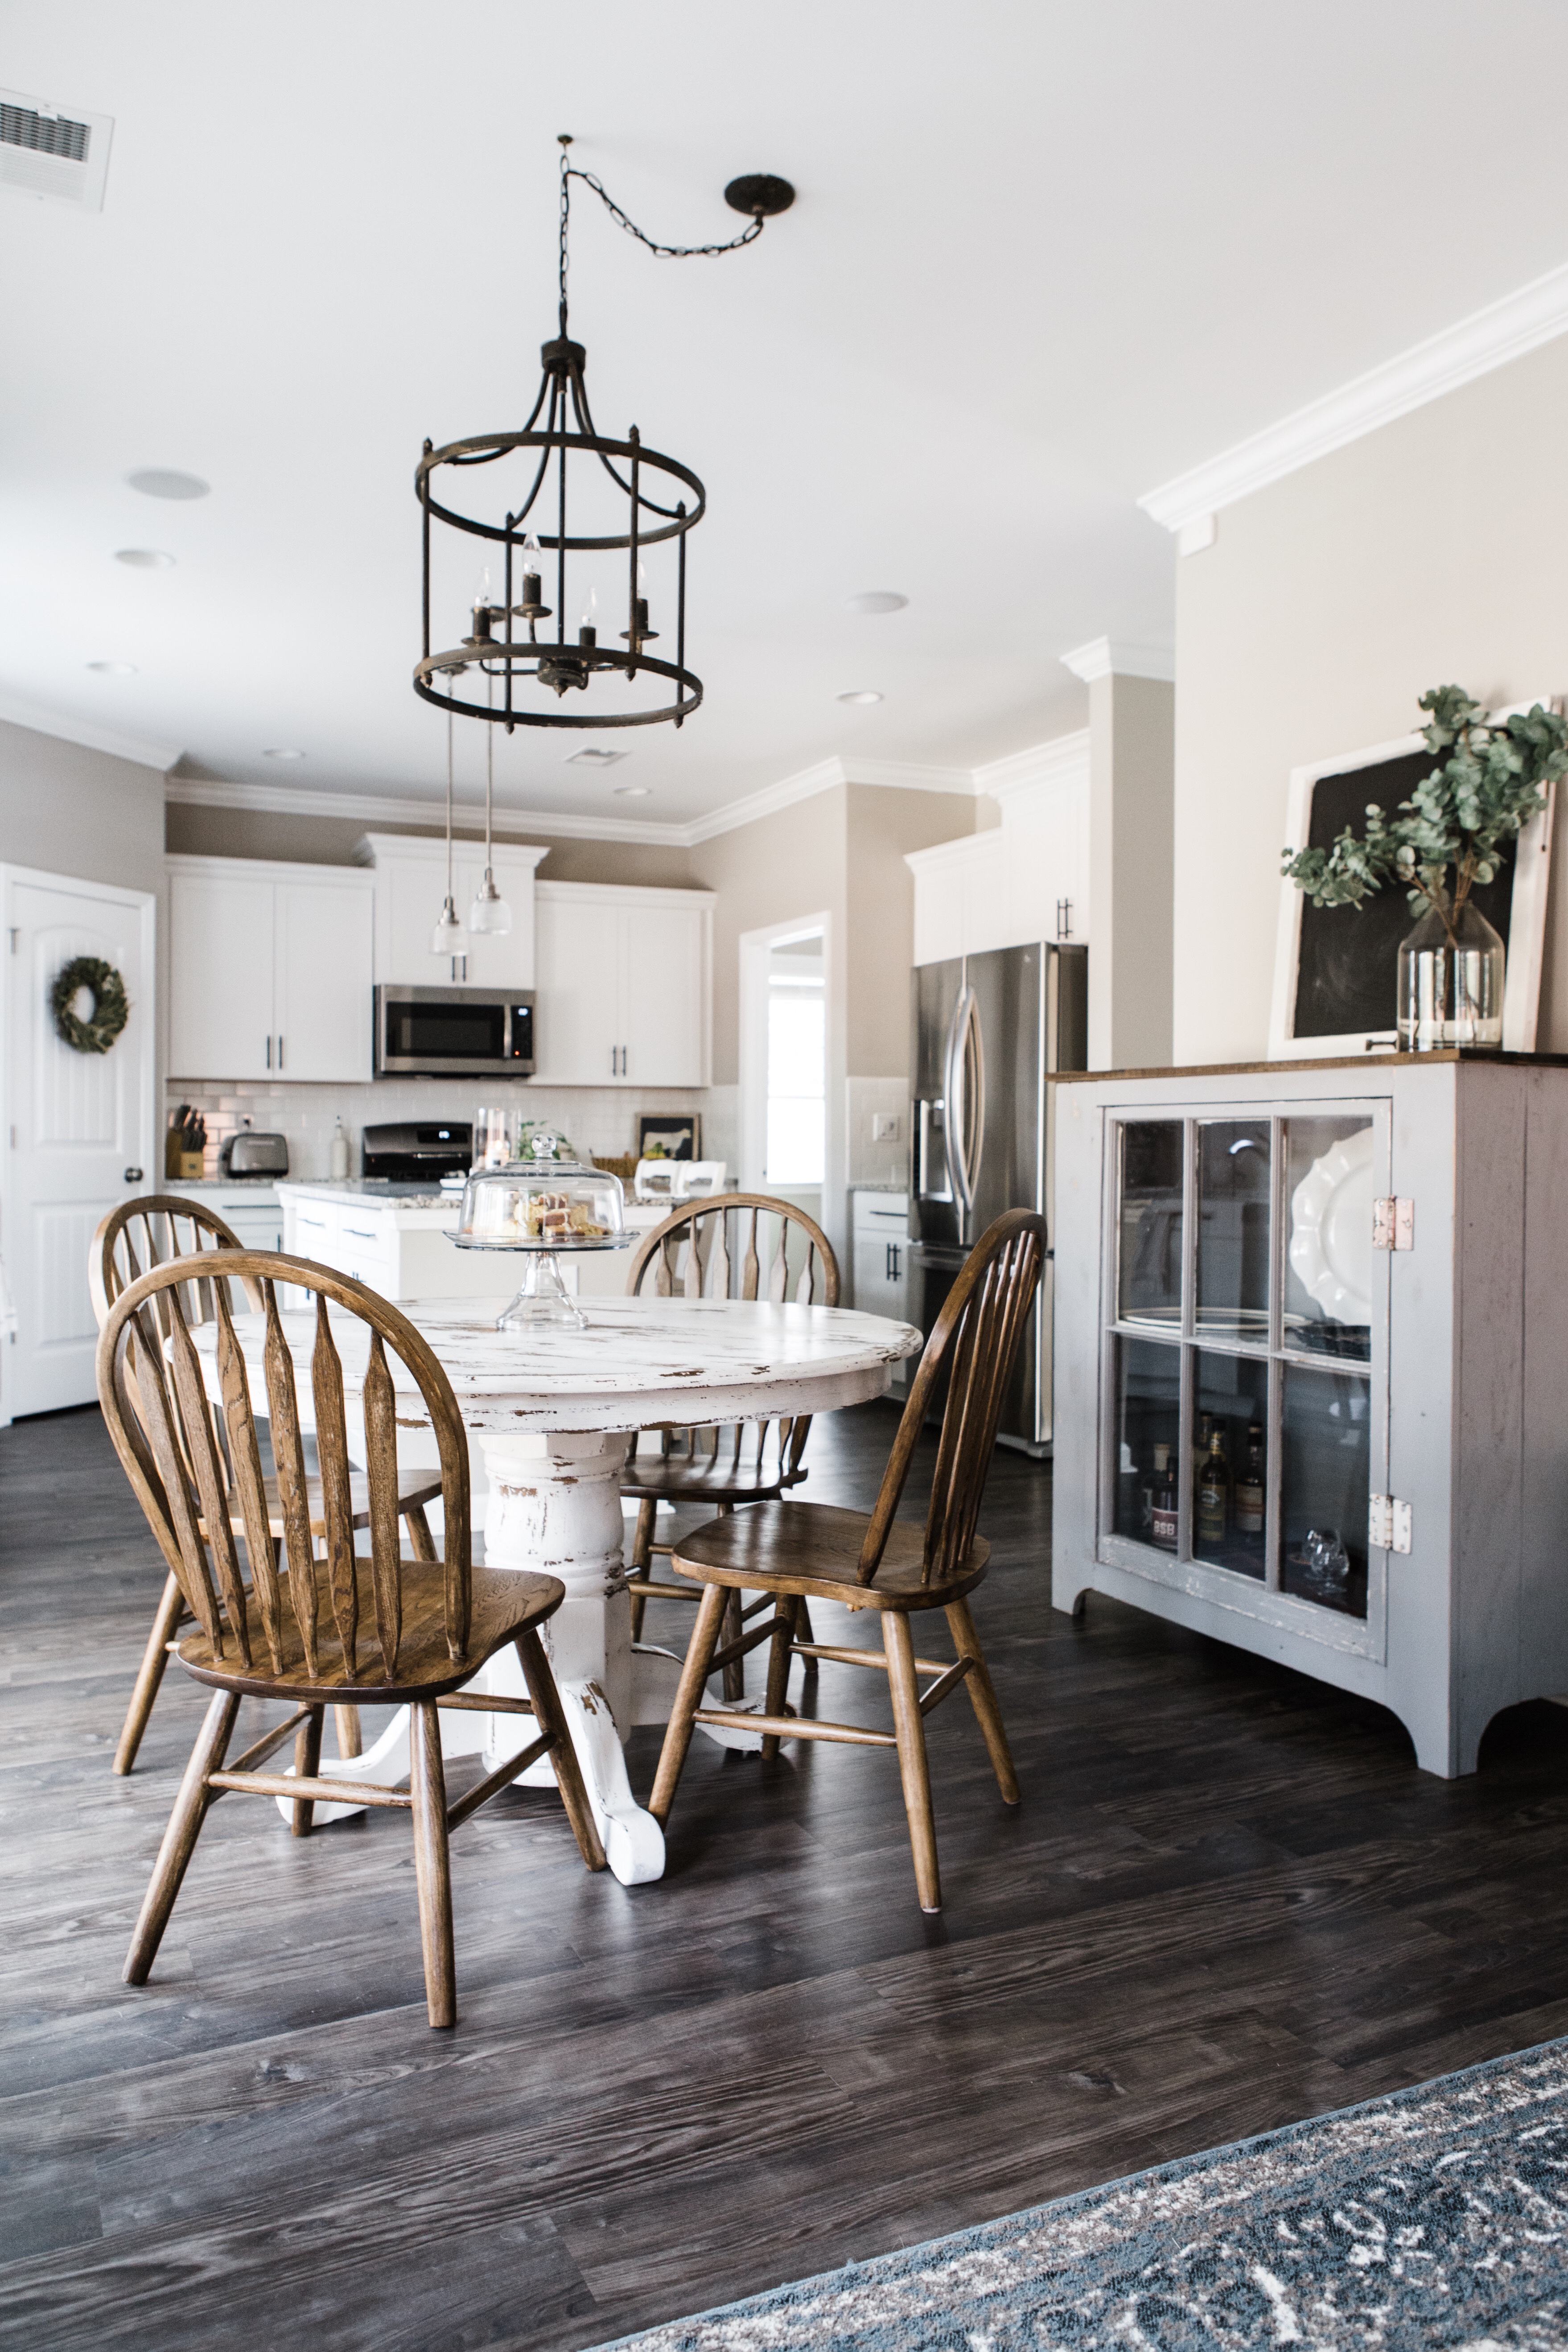
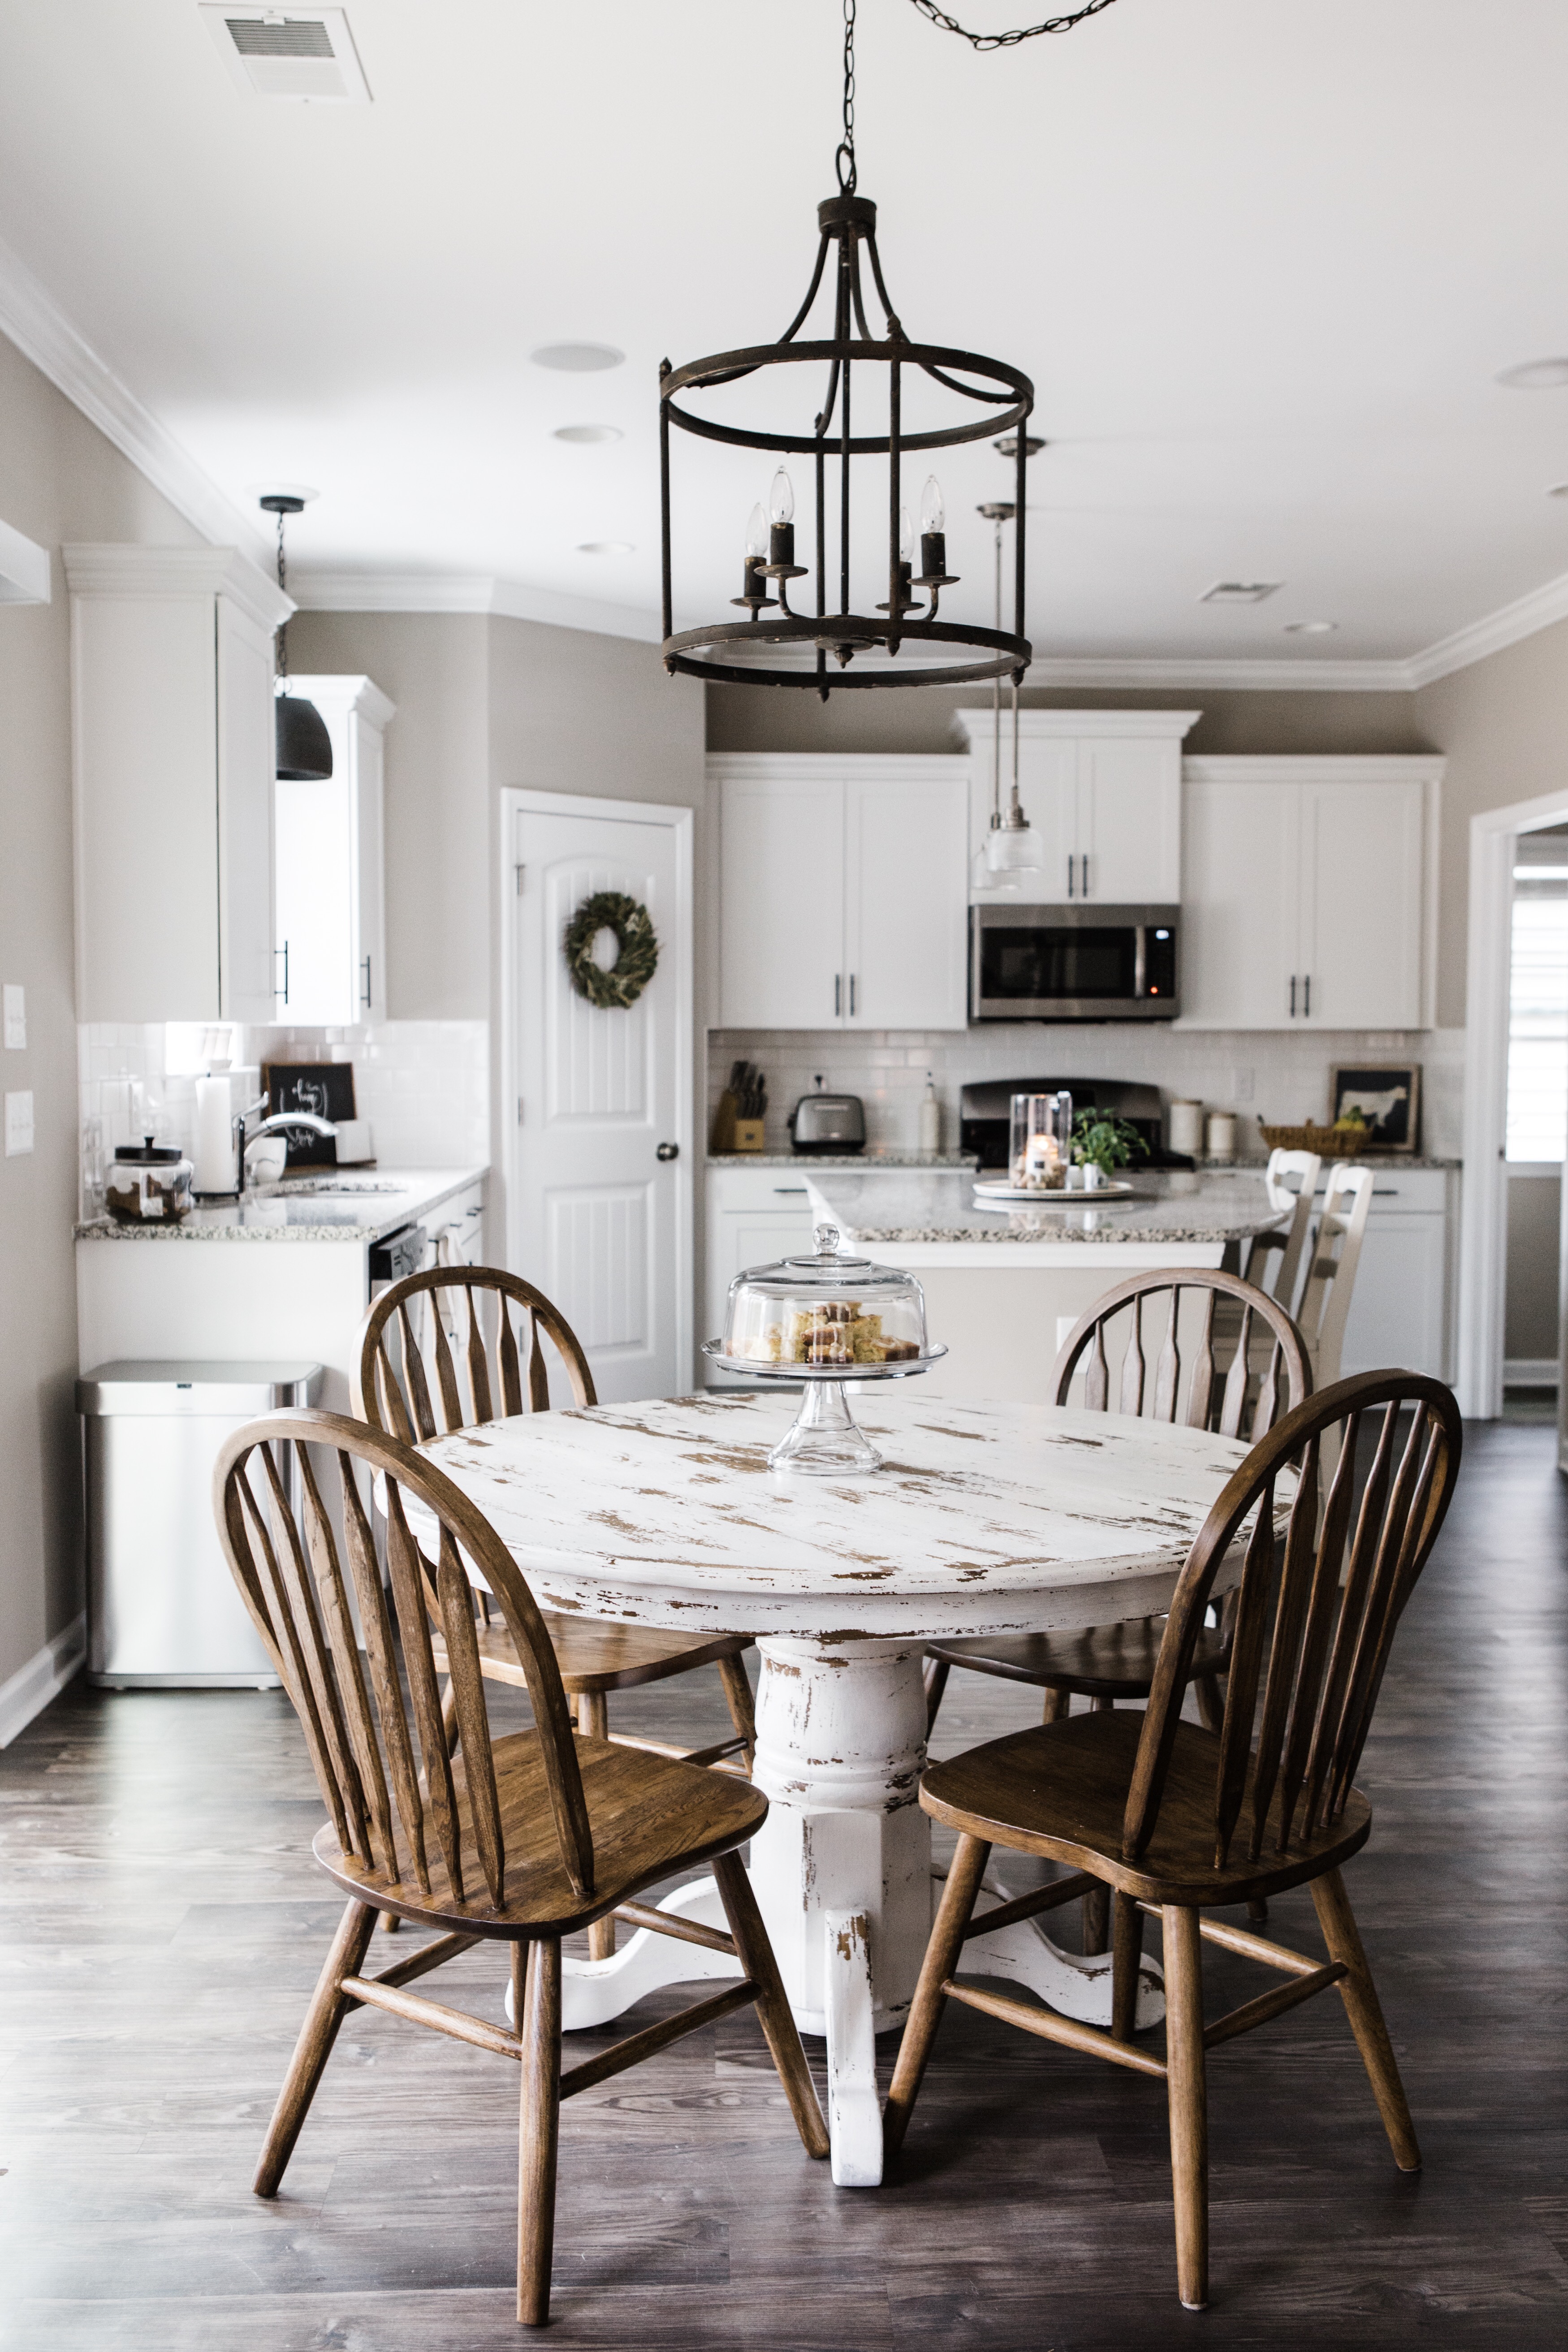
Did I mention this wasn’t even our table?! HA! It was all worth it though. Our friends (and neighbors) Aubrey and Alex had been passed down their solid wood, red crackled kitchen table from Aubrey’s parents. Her parents bought it soon after they got married. It was raw wood at that time so they just covered it with a few coats of poly to protect it. Years down the road, her dad decided to add some 90’s spunk to it and painted it red and then added a crackle effect to the top. Anyone remember that stuff? It was so popular when we were growing up! He also coated that with some poly. Years later from that, it was passed down to Aubrey and Alex. I love that this table had a story well before I started working on it and I’m so excited for all of the chapters that will be written around it in the years to come. Since I’ve known Aubrey, which is going on 4 years (and 3 different bases!), she has complained about the table and how it didn’t fit her style. She always had dreams of stripping it and refinishing it.
In January we came over to help her with something and she mentioned her desire to do the table again but that she couldn’t because she was pregnant. Before I could even think, the question “Do you want me to just do it?” slipped out of my mouth. She couldn’t pass up the offer (I mean… Who would?!) so within a couple of days, I found myself standing out in the cold staring at this red crackled table with some paint stripper and a scraper in hand. I was so determined to make this table my ….. Ya know what I mean?
After three months of spending more time with that table than my own husband, I consider myself a paint stripping pro. Today on this post I’ll be sharing every single thing that I learned and what I would suggest for you to do if you wish to do the same. Do I plan to do this again in the near future? NOPE. Will I EVER work on chairs again? Most likely not. They were certainly the worst part. The table? Easy peasy… Add 6+ spindles though… Oh my lanta, Batman. Here’s what you do in that scenario – just go ahead chop your poor hands off now, throw them out the window and throw your patience out too along with them (only kidding… please do not do that).
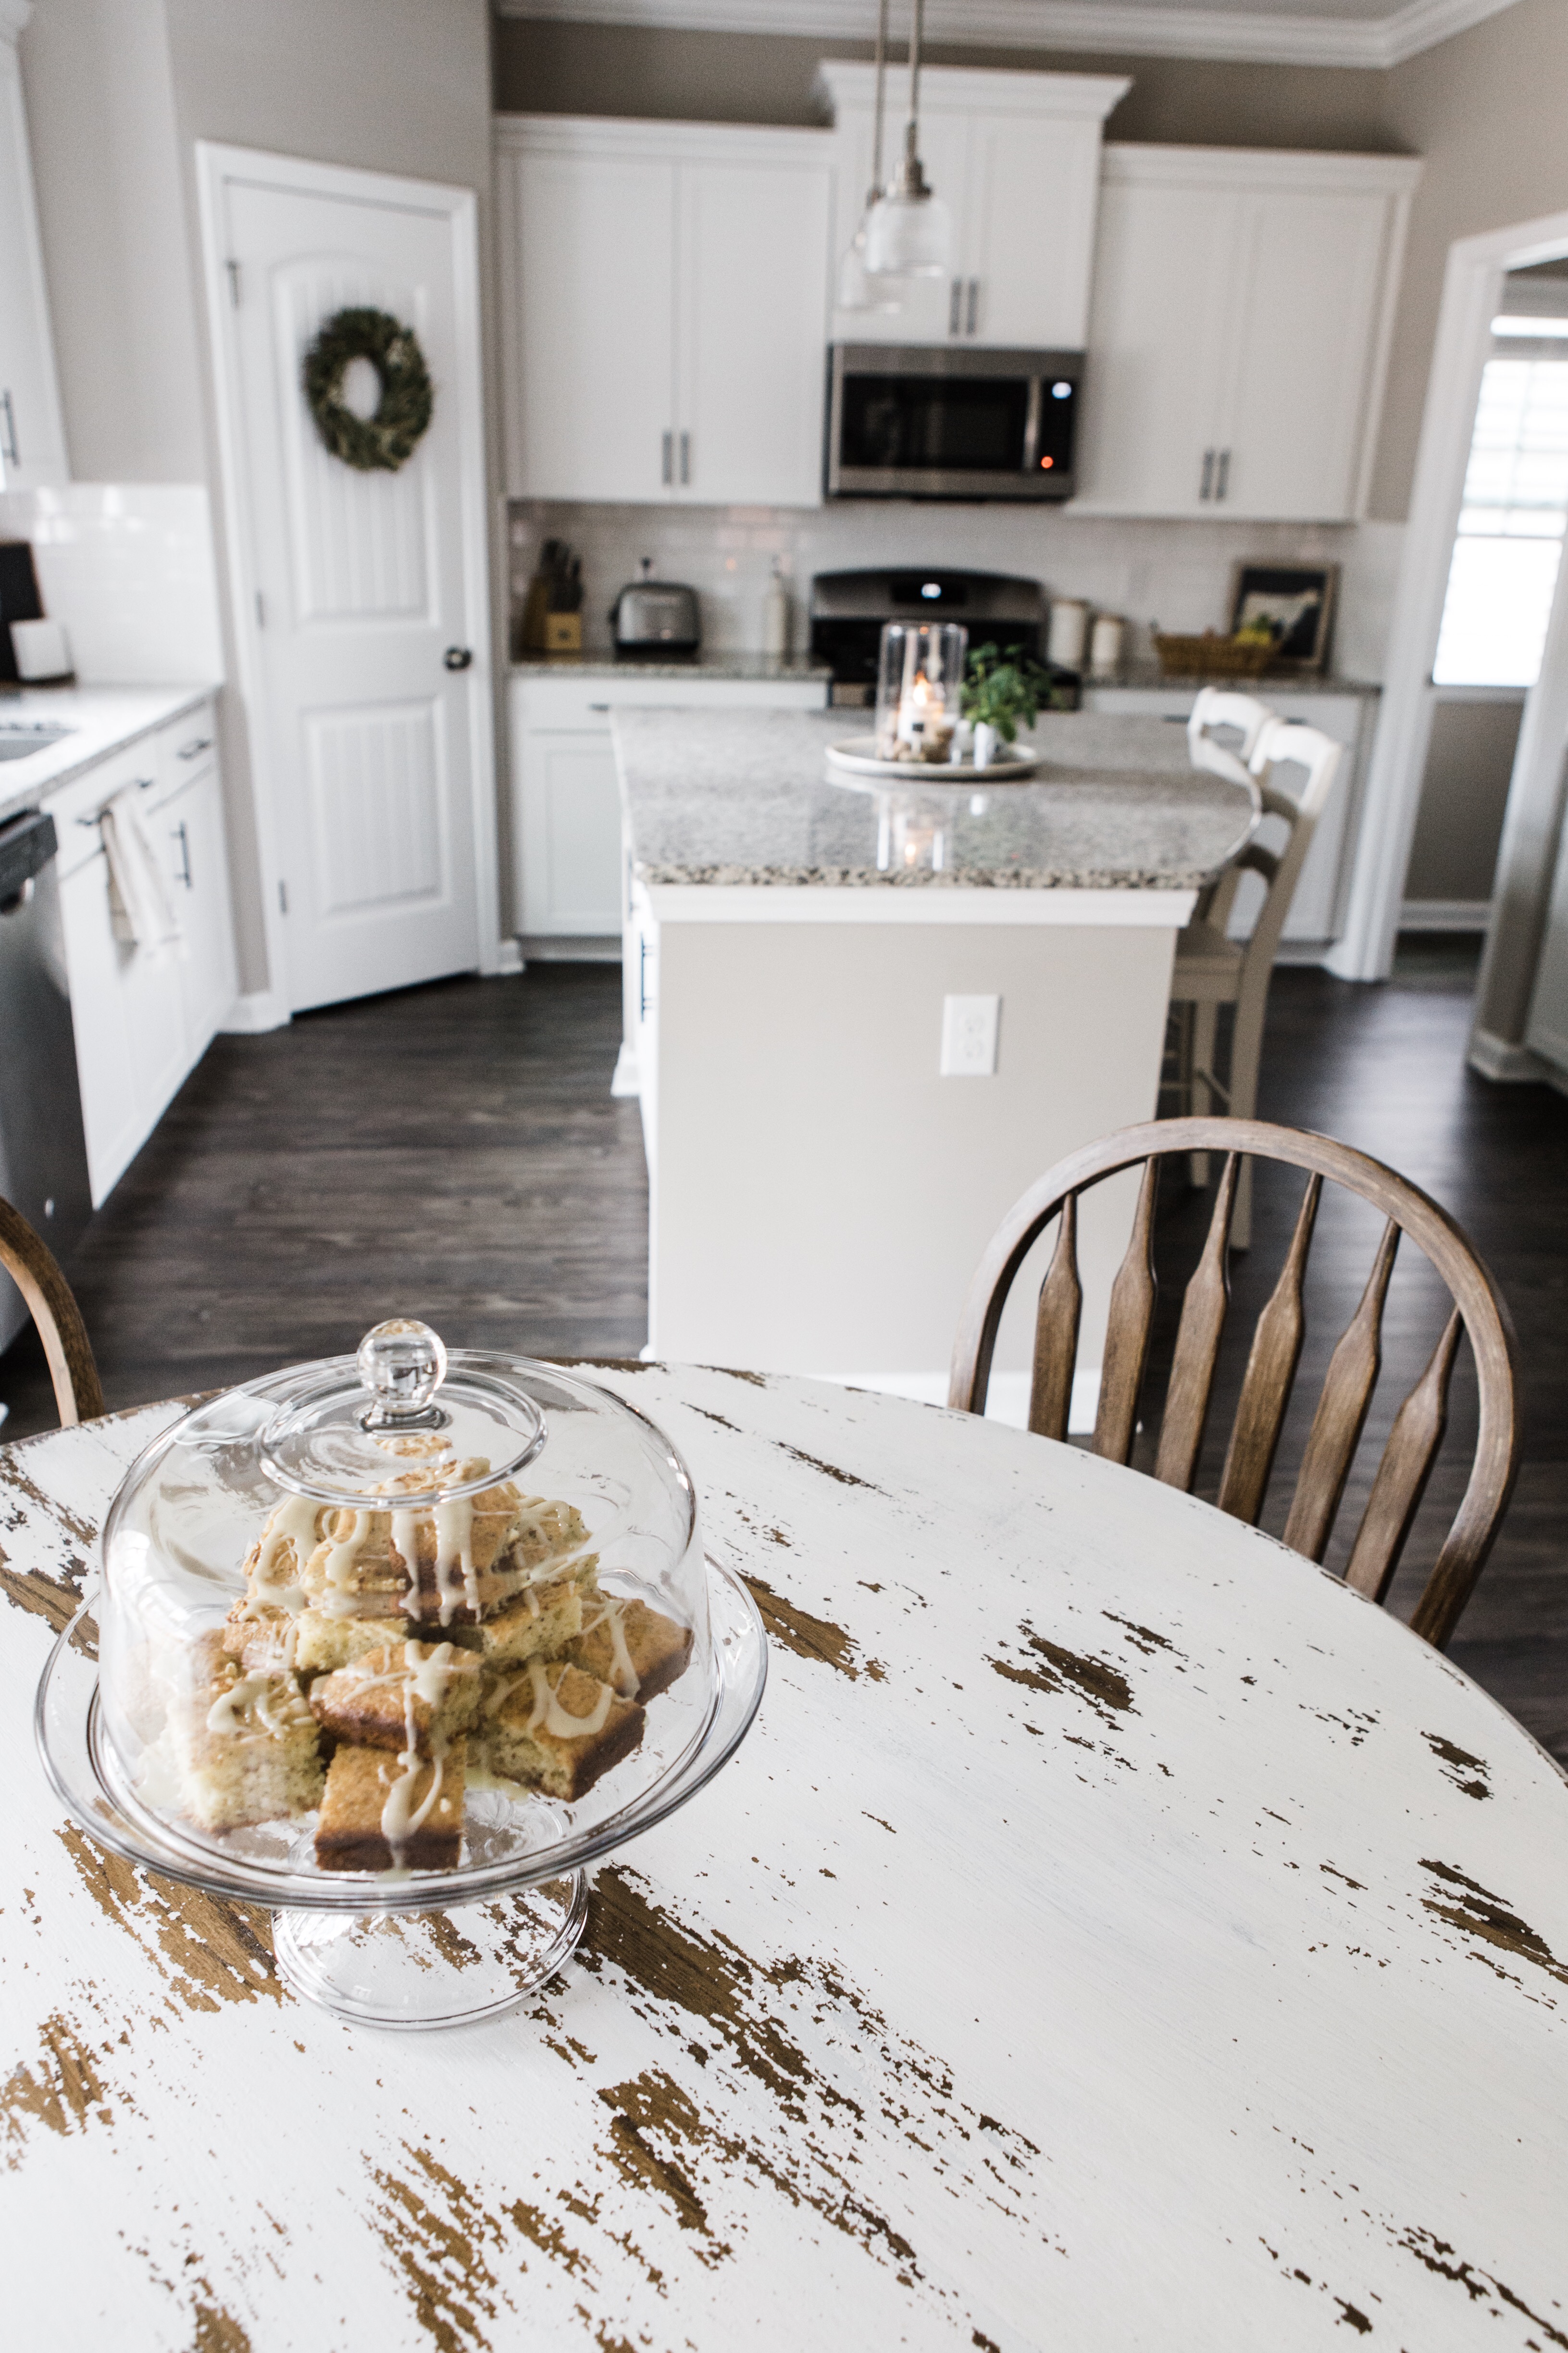
All kidding aside, I said that it was all worth it and it 10000% was. Aubrey cried when she saw the finished result for the first time and I wanted to start weeping right alongside her. It was a labor of love, without a doubt. Here’s why it was so important to me though – the table to me is the center of the household. It is common ground to gather around as a family every night. It encourages the creation of new memories or reminiscing over old ones. It is the place where the family grows together, talks about their day, learns that they don’t like mom’s tuna casserole, and blows out the birthday candles. It’s such a special place in the home. She had never loved her living room/kitchen space. It never felt complete to her. Considering we move frequently in the military and we’re far away from our families, I believe it’s so important that we create spaces that bring us joy and make us feel like we’re home. Once the “new” table was in place she said to me, “I just want to cry I love it so much! This whole living room/kitchen area feels cozy and like home now.” WORTH. IT.
What You’ll Need:
- Respirator mask (make sure to follow the instructions on how to use it properly!)
- Protective glasses/goggles
- CitriStrip
- Gloves
- Old paint brush to apply stripper with
- Open container to hold the stripper in (I’d suggest a metal one, if possible)
- Open container with a plastic bag inside to add the “scrapings” into
- Scraper – big and small
- Wire brush
- Large plastic drop cloth or old shower curtain for the floor and to cover the furniture
- Paint stripper After Wash
- Orbital sander – this one had great reviews on Amazon and is inexpensive!
- Sand paper for your sander – we used these in 50 and 120
- Course and fine grit sanding blocks – we had 60 and a few within 130-220 (the angled blocks were really helpful!)
- Stain – we used Minwax Dark Walnut
- Rags or staining pads
- Paint – we used Old Barn Milk Paint in the color Sweet Cream
- Paint brush
- Top coat – we used Minwax clear matte polycrylic but I also found THIS that would probably work very well!
What To Do:
STRIP
- Start by covering your work space with the plastic drop cloth to protect your floors. There’s a good chance it’s about to get messy in there!
- Put on your respirator mask, goggles, and gloves. I highly suggest reading the directions to make sure you’re using the mask correctly. I had to go through a whole training in grad school to learn how to use it properly. Who knew it could be so complicated… It’s justified though! Safety first!
- Apply a thick, generous coat of CitriStrip to your furniture piece using a brush.
- Option/scenario 1: Let the stripper sit and work its magic for a minimum of 30 minutes. This will suffice if the piece you’re working on doesn’t have many layers of paint/stain that you’re trying to strip off.
- Option/scenario 2: If the piece that you’re working on has a lot of layers of paint (like the table and chairs did), I suggest adding a piece of plastic or trash bags on top of the stripper drenched furniture piece and letting it soak in for at least 2 hours (you might be able to do less if the stars are aligned with the weather and the type of paint on the piece. Check under the plastic periodically to see if the paint is bubbling up and looks like it’ll scrape off easily!). The plastic will keep it from drying out.
- There were some cases when I let it sit over night. The CitriStrip did dry in some of those cases, especially when it was less humid outside, so I would add new stripper on top of that and let it sit for about 30 minutes to “re-wet” it. Once it soaks in a bit, it will be easy to scrape.
- Use the scraper to scrape all of the paint/poly/stain whatever you’re battling off. For the tiny crevices, the wire brushes were VERY helpful! If a section is being extra difficult to scrape off, add more stripper to it and go work on another section while it soaks in before returning back to it. Use the bucket or container you set aside to collect all of the paint you scrape off. Trust me, it becomes a serious headache if you just wipe it on the plastic protecting the floor!
- Once the piece is completely stripped, let it dry completely. I liked to set it out in the sun for a bit to speed up that process.
- Use the After Wash to remove any extra goop that’s left on the chairs. I thought this stuff was going to be a load of you know what but it actually helped us a ton to clean up the chairs and table before sanding.


SAND
- At this point you should have a mostly paint/stain/poly free piece of furniture. I hope this makes you smile and gives you some hope! The worst part is over… At least in my opinion. There is light at the end of the tunnel! You can do it!!!
- Start by using course grit paper on your sander or sanding block if you’re doing it by hand over the entire piece. We started out using 50 or 60 grit because we wanted to make sure the only thing remaining was raw wood. For the spots you can’t reach with the sander, use a sanding block or piece of sand paper.
- Sand the entire piece using a tad bit finer grit such as 90 and then do the same process again using an even finer grit until it’s to the smoothness of your liking! We pretty much did 50, 90, 130/220. It wasn’t very scientific for us. “Smooth enough?” “Nope.” *picks up the fine grit block and sands some more….*
Finish up your piece by adding a coat of polycrylic, staining it, painting it, or all of the above!


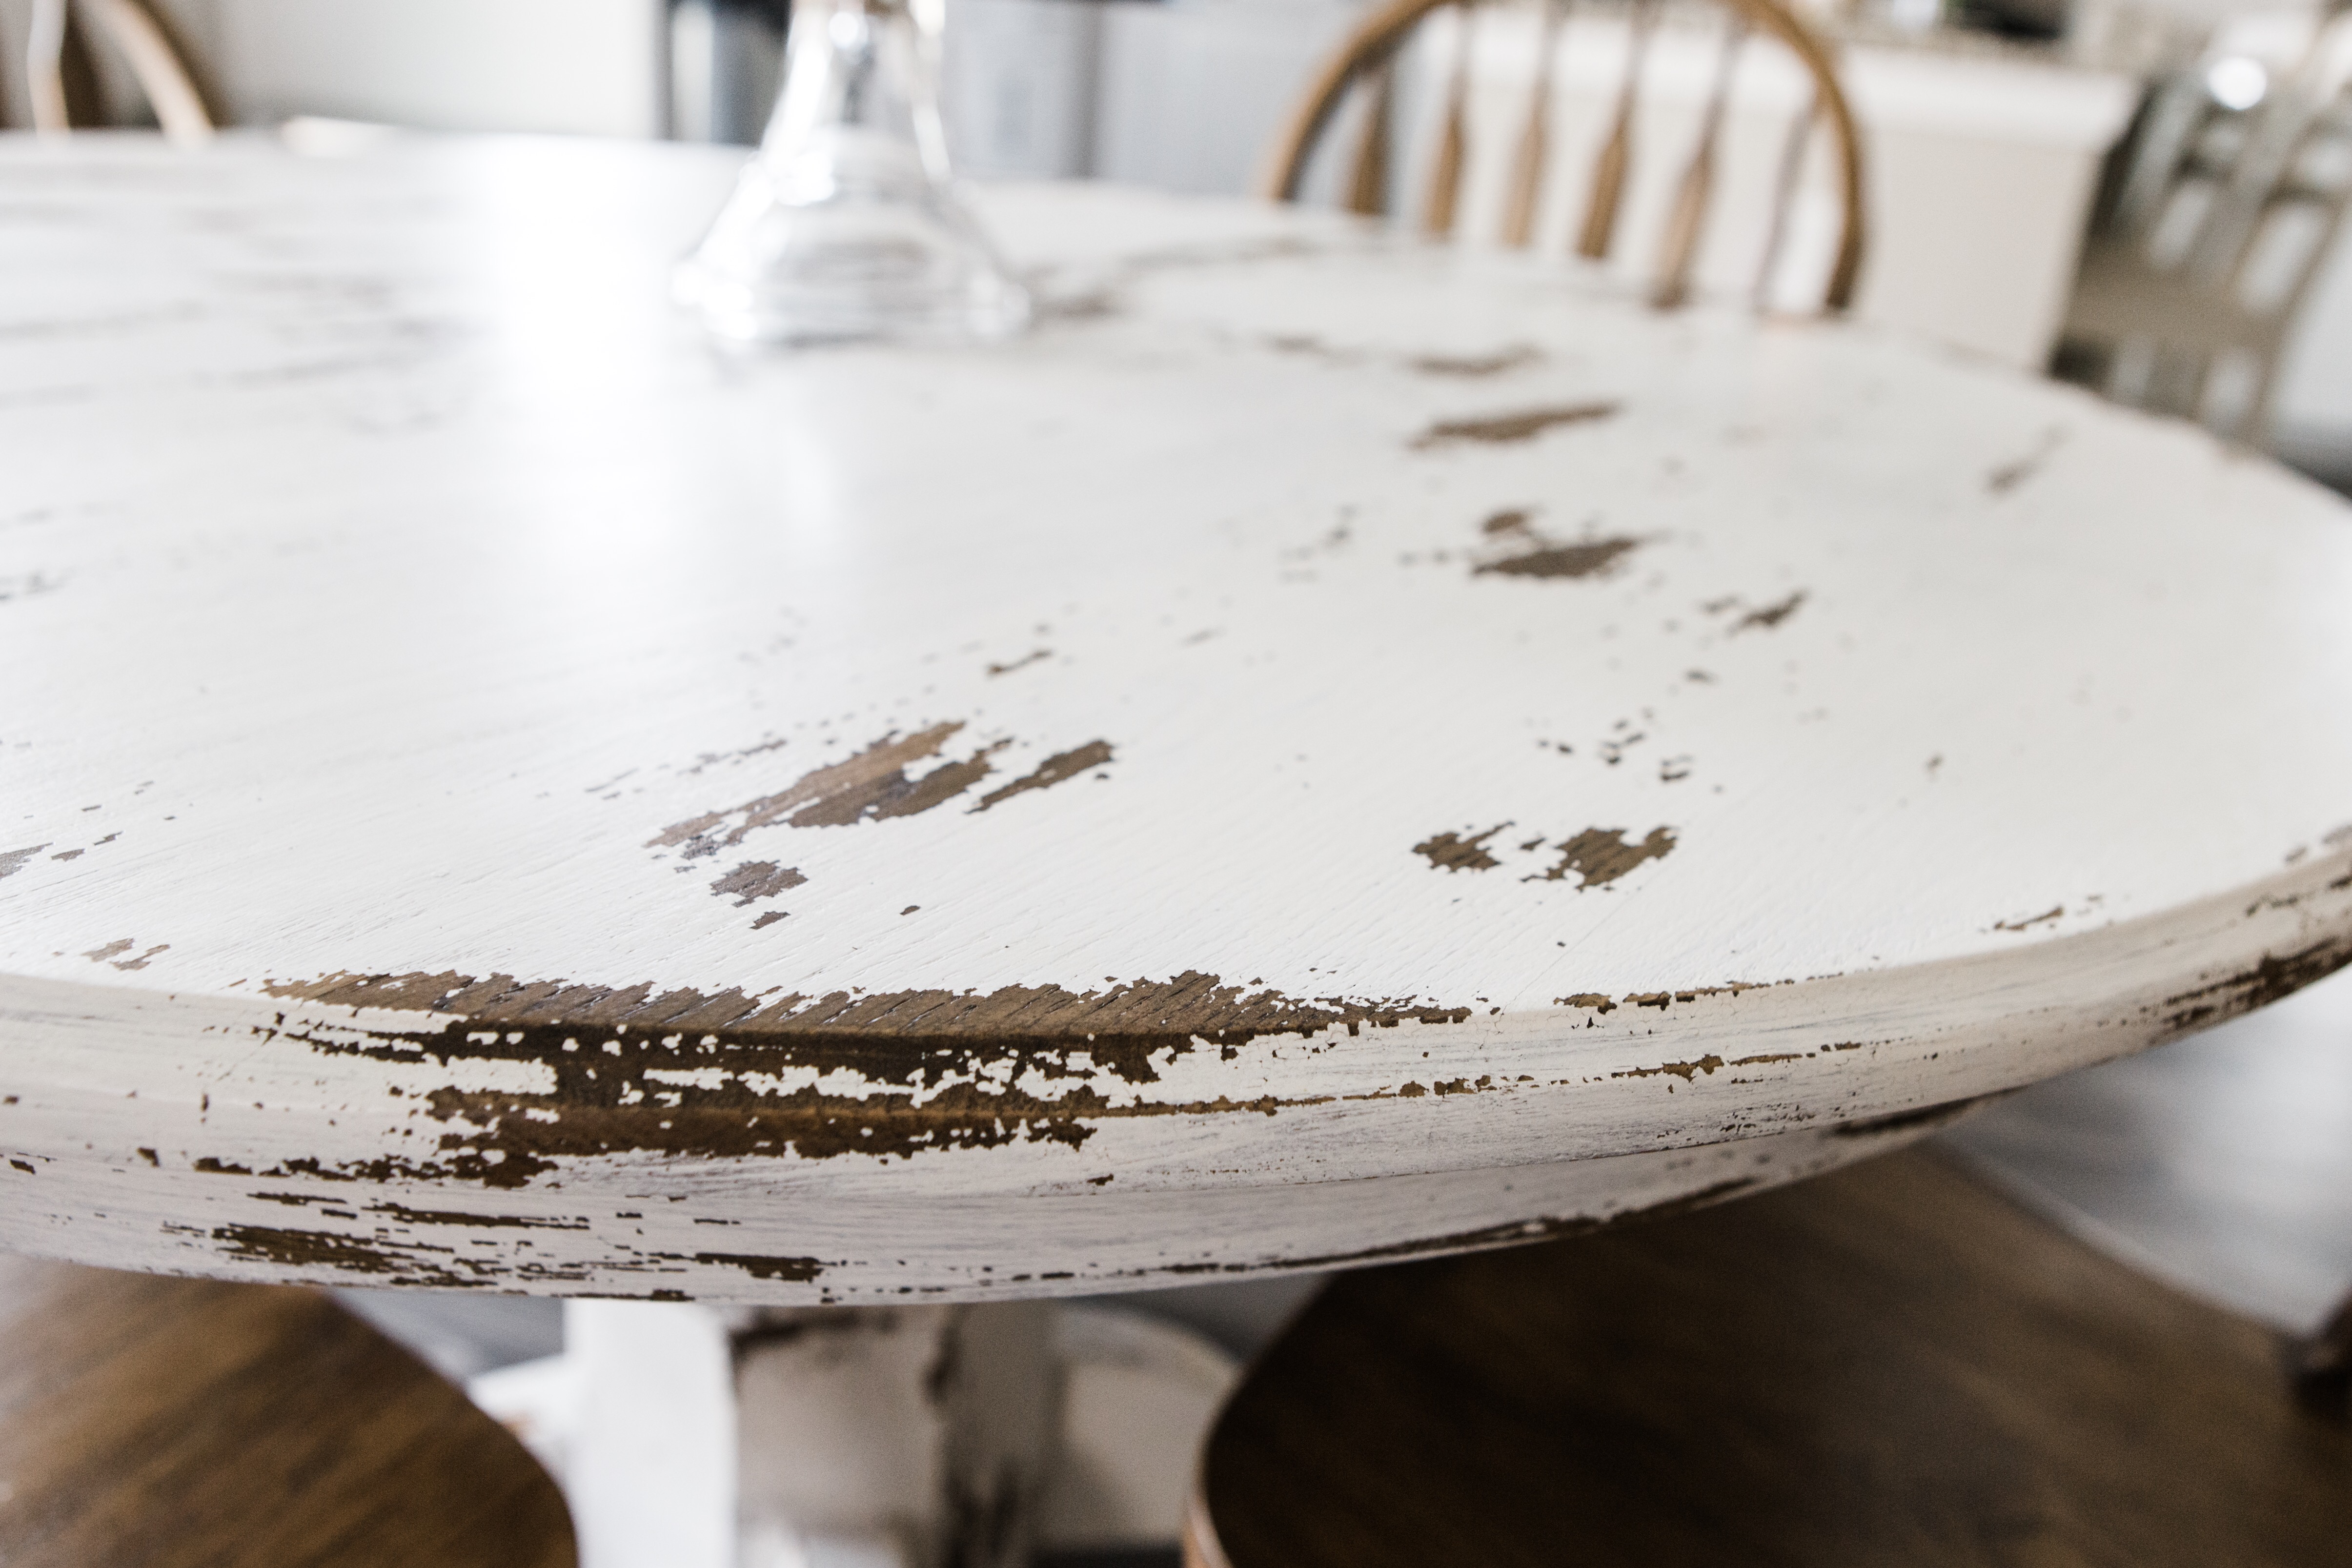
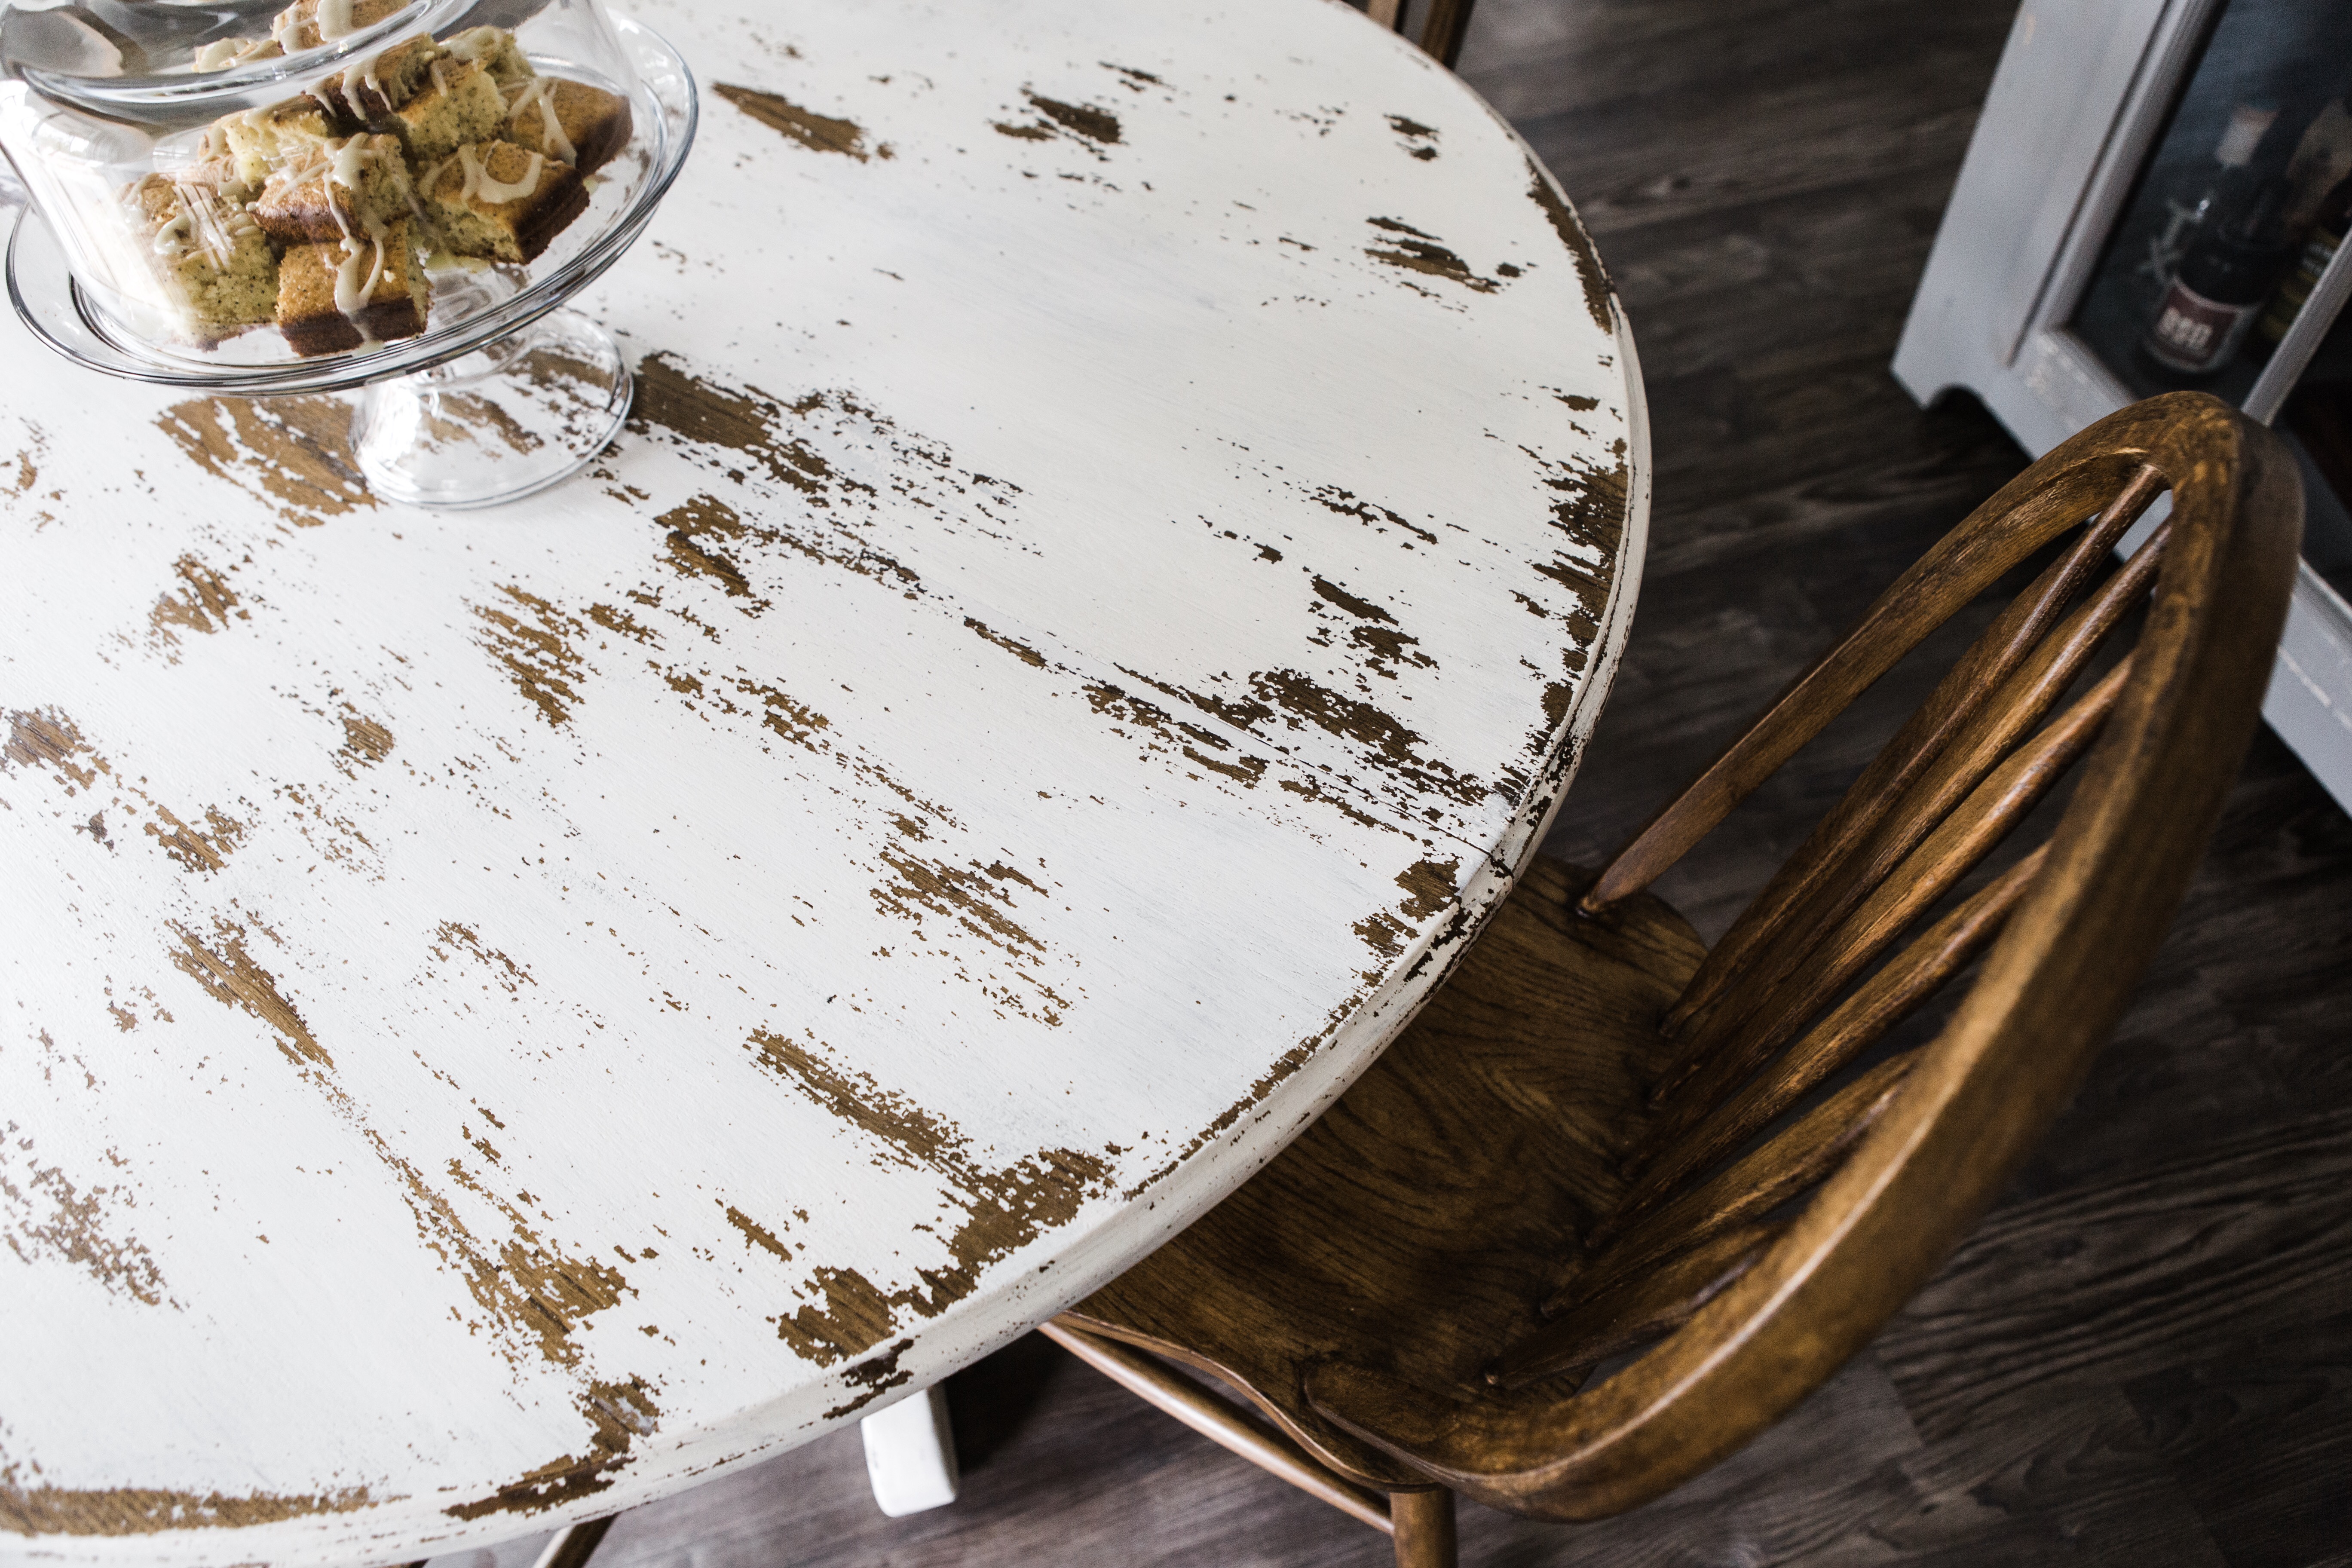
Want a chippy, farmhouse look? Continue reading!
STAIN
- Lightly dip a cotton-free rag or staining pad into the stain. In the same direction as the grain, rub the stain into the wood until it’s evenly dispersed.
- Continue until the entire piece is stained.
- Let it dry.
- Repeat those steps until you reach your desired shade. For the chairs and tables, we stained them each 3 times.


PAINT
To preface this, I had never used Old Barn Milk Paint before doing this table so I had to learn quickly! I plan to do an entire post about this specifically because it was significantly different than using any other paint. For now, here’s the summary of what to do –
- Follow the directions on the back of the packaging to prepare the paint.
- Using a clean paint brush, apply one coat of milk paint to the furniture piece. If you don’t want it to look streaky, I’d focus on one section before moving onto the next section. It will start to chip quickly if it doesn’t soak into the wood so going back and doing a second coat was difficult. It’s best to work in small sections!
- After the paint dries, which is very quick, it’ll start to visibly chip.
- Use a scraper to chip the paint away to give it a chippy look!
- Very lightly sand over the top of the piece using a very fine sanding block.
- Wipe off or vacuum off any dust.
PROTECT
- To protect the table and to prevent it from chipping more, apply polycrylic by following the directions on the back of the container.
- We added 4 coats of clear matte polycrylic to the table top and base and 2 coats to the chairs.
- Let it dry overnight.
- Love on your new piece of furniture!
EXTRAS
I did try using THIS paint stripper originally. It was much more effective than the CitriStrip so it took much less time to remove the paint. However, I learned while in the middle of using it that it contains methylene chloride, a compound that has been linked to cancer, among other things. Especially considering how much time I was going to be spending around the stuff, I decided to try out CitriStrip. I do want to point out though that just because CitriStrip does not contain methylene chloride, doesn’t mean it’s great to inhale for days on end. Please be cautious and use proper PPE!
I know that was a lot of information. I hope for those of you that are interested in trying a project like this that it’s so helpful! If you do, I’d LOVE to see your results! Make sure to tag me on Instagram! Don’t hesitate to let me know if you have any questions.
I sincerely appreciate you all shopping through my affiliate links like the ones included in this post. I make a small commission when you purchase through these links at no extra cost to you. These funds help support my family and allow for us to produce better content for you all. I can’t thank you enough for supporting all that we do!
Pin this post to save for later by clicking on the little Pinterest icon!
jordan jean
Leave a Reply


[…] that we’ve finished probably two of the most involved projects of the year (posts HERE and HERE), we’re ready to start tackling other rooms in our home. As a lot of you know, we live in a […]